Holiday Party DIYs: Jingle Bell Shaker + Mocktail Recipes

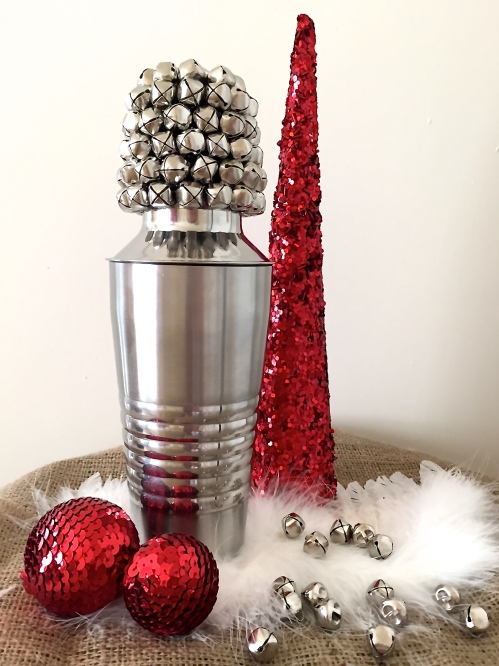
IMG_4017When planning a holiday party, drinks are a must.  Often the drinks don’t get the attention they deserve because it is so easy to go to the store and buy soda or tea or whatever, especially if you choose not to serve alcohol at your party.  This project is all about adding a little Christmas-y fun to drink making so that you’ll take the extra time to make drinks for your guests that everyone will enjoy.

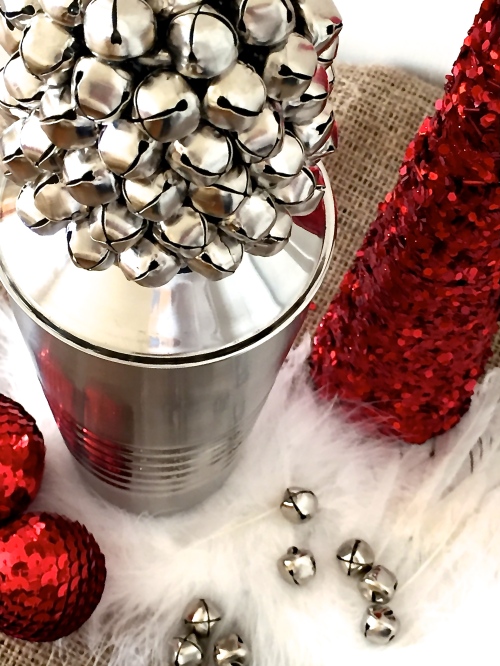
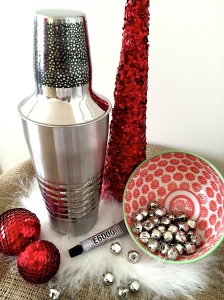
For starters, you need the right tools to make beverages just like you do when cooking food.  A cocktail shaker is a good tool even for nonalcoholic drinks.  I was inspired by a gorgeous bell-encrusted shaker I saw on Anthropologie (of course…), but I didn’t necessarily want to spend that much money on one.  Solution: I made it myself.

IMG_4005

Supplies:

  1. Cocktail shaker – I found one at TJMaxx for $7
  2. Bells – Dollar Tree.  The coolest part is that the bells don’t make an annoying noise.  Just a light nice sound commemorative of sleigh bells.  Ahh….
  3. Glue – I used the E6000 permanent bond variety.  I would recommend buying a larger tube than the one in the picture.

What to do:

  1. Take off the jigger (top piece) and set it on a surface you don’t mind getting a little glue on.  You can also put a paper towel or something down to protect your surfaces.IMG_4008
  2. Just start gluing the little bells on.  The only tip I know to give you is not to skimp on the glue.  If you do, they will keep falling off as you add on your bells, and it’s really annoying.  Trust me.
  3. Continue gluing on bells until the outside surface of the jigger is covered and let dry.
  4. Mix up a fun beverage and enjoy the sweet bell sounds!

Need some drink inspiration?  Check out these recipes and choose the perfect one (or four?) for your party.
IMG_4014

Holiday Party DIYs: Dessert Plates

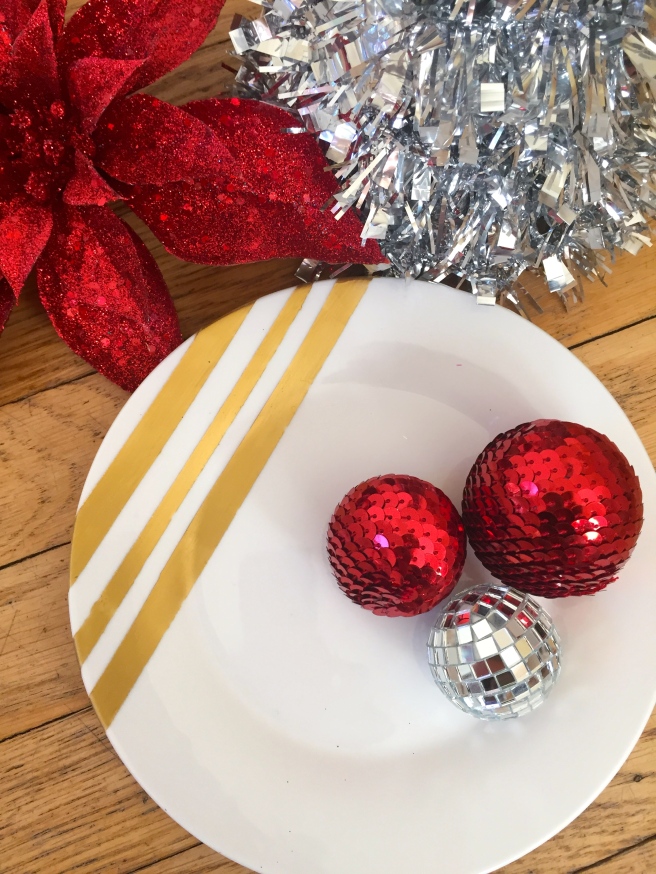
IMG_3987Yes, I am one of those people…  The kind of person that doesn’t mind that Christmas items are put out in stores before Halloween.  That being said, I don’t let myself decorate for Christmas until after Thanksgiving and only allow myself one or two listens to a few of my favorite Christmas songs.  I’ve already warned my husband the second the plane touches down after we visit his folks for turkey day, it is game on.  The decorating begins.

However, I find it completely justifiable to create holiday-related projects at any time of year, though.  I mean, it’s just good planning.  So, yes…I have started my Christmas DIY projects before Thanksgiving, and I definitely won’t judge if you join in.

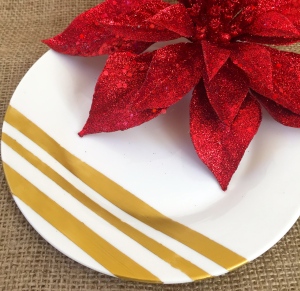
This year, I centered my projects around items for a holiday party.  I have a new house and both my husband and I like having people over for dinner, games, etc.  I sort of believe that a party isn’t a party without dessert of some kind, so I decided on making really cute dessert plates.
Supplies:

  1. White dessert plates – I found mine at the dollar store
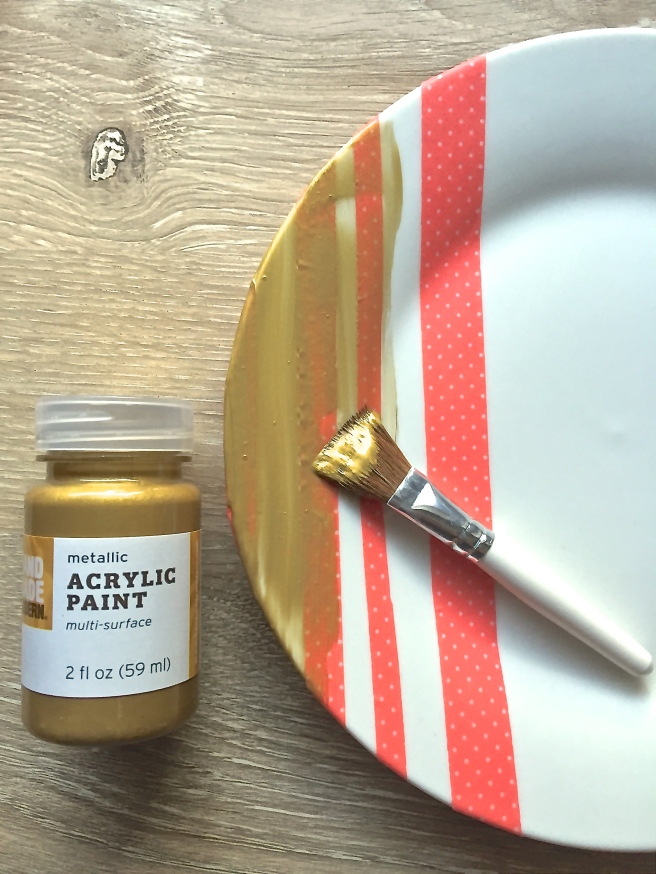
  2. Metallic multi-surface acrylic paint – I used Hand Made Modern 20K Gold acrylic paint from Target.  They even have rose gold if you’re following that gorgeous trend.  It is important that you find paint that will work on the plates you chose and follow the instructions provided to you with the paint.  This paint explains that it IS top-shelf dishwasher safe, which is super important.  you don’t want all your hard work to wash off after the first use.
  3. A brush of some kind – I used a small brush I had on hand, but sponge brushes are great for craft projects and you don’t have to worry about leaving behind stray brush hairs…
  4. Tape
  5. Exacto knife (optional)

What to do:

  1. Wash the plates and then clean the surface with rubbing alcohol.  This allows for a better surface for the paint to adhere to.
  2. Decide on your pattern.  I opted for a very simple stripe design because that is what I like.  Make your pattern reflect who you are.  That will make the time spent on your project more enjoyable.  A crazy geometric pattern could be fun too!Dessert Plates 1
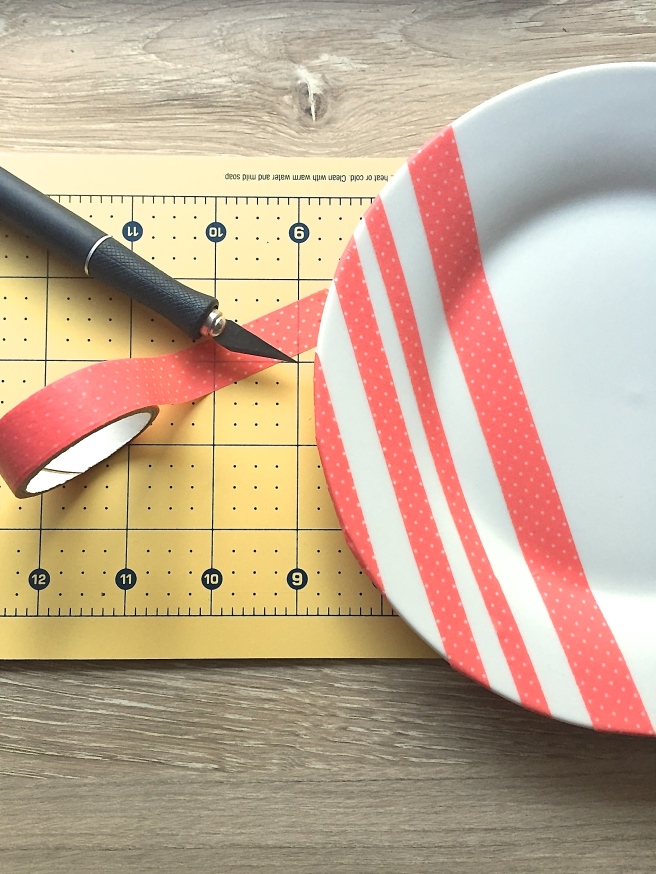
  3. Tape off your pattern on the plate.  I cut my tape in order to make different size stripes.  Make sure the tape is completely stuck down.  You don’t want paint getting under it and messing up your design.
  4. Give your plate one coat of paint and wait for it to dry at least an hour before you apply another coat.  Coat as many times as you think necessary.Dessert Plate 2
  5. Remove the tape once the paint is completely dry.  Allow your paint to dry for at least 21 days (curing process) before use.  There is a bake-to-cure method for those who just can’t wait, but you must make sure your paint can withstand the process.  It is best that you start the project early and let it air dry.
  6. Enjoy!IMG_3986

10 DIY’s to Celebrate Summer

As I enter my last week of teaching before the summer break, I am itching to figure out how to spend my upcoming days aside from wedding plans.  I cannot wait to get started on these!

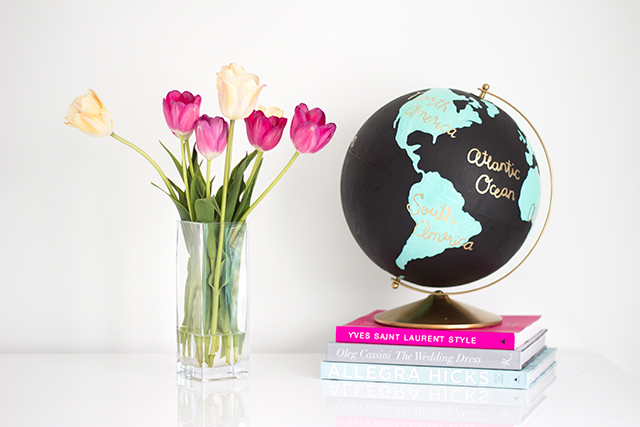
1. Wanderlust Globe: Record your summer travels (or dreamed of travels) with this Anthropologie-esque globe.

Via Pretty Little Details

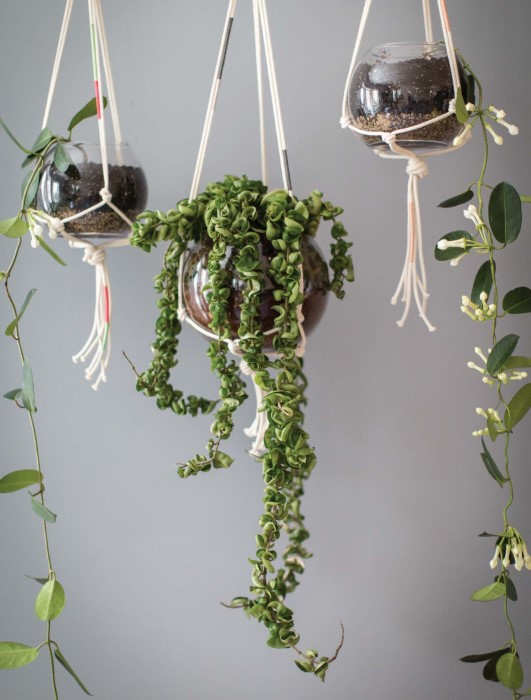
2. Macrame Hanging Planters: Bring the outdoors in with this modern take on macrame hangers.

Via Garden Therapy
Via Garden Therapy

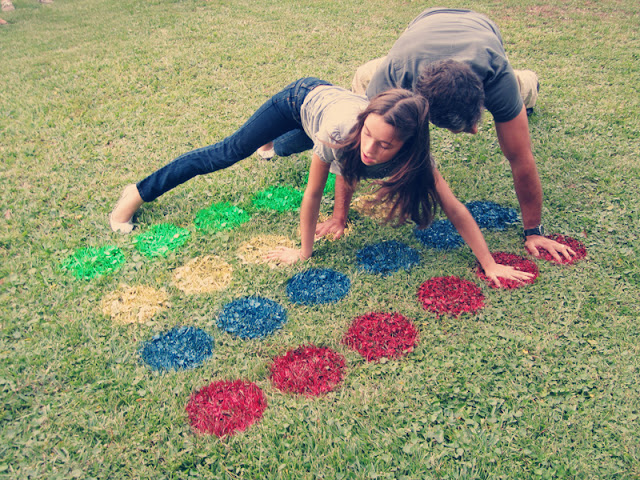
3. Outdoor Twister: Forget the plastic sheet that never stays put!  Bring the fun outdoors with this lawn DIY.

Via You + Me
Via You + Me

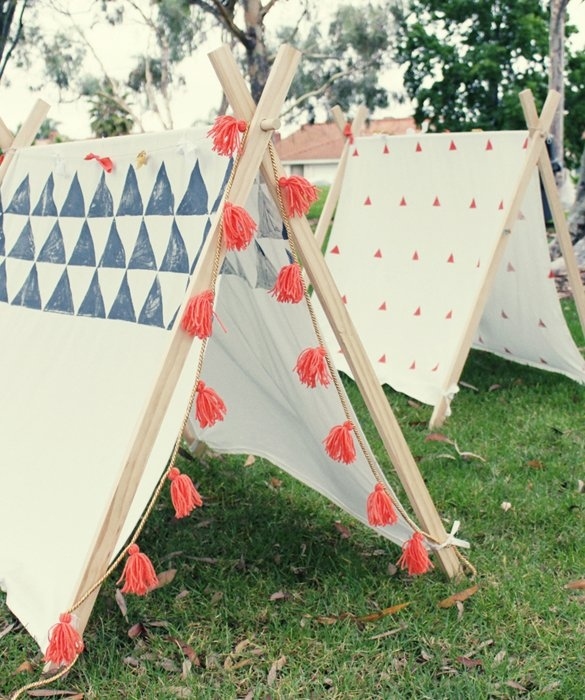
4. Build a Teepee: What better way to offer your kids (or yourself) a backyard getaway?

Via Cakies
Via Cakies

5. Movie Theater: Yes to relaxing summer nights with your friends at your own personal theater that shows what you want, when you want.

Via Giver's Log
Via Giver’s Log

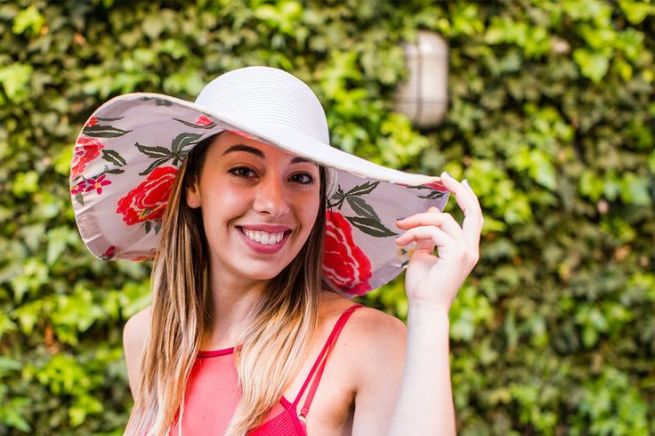
5. Beach Hat Redo: Summer hat need an update?  Follow these instructions for a fresh new look.

Via Brit+Co
Via Brit+Co

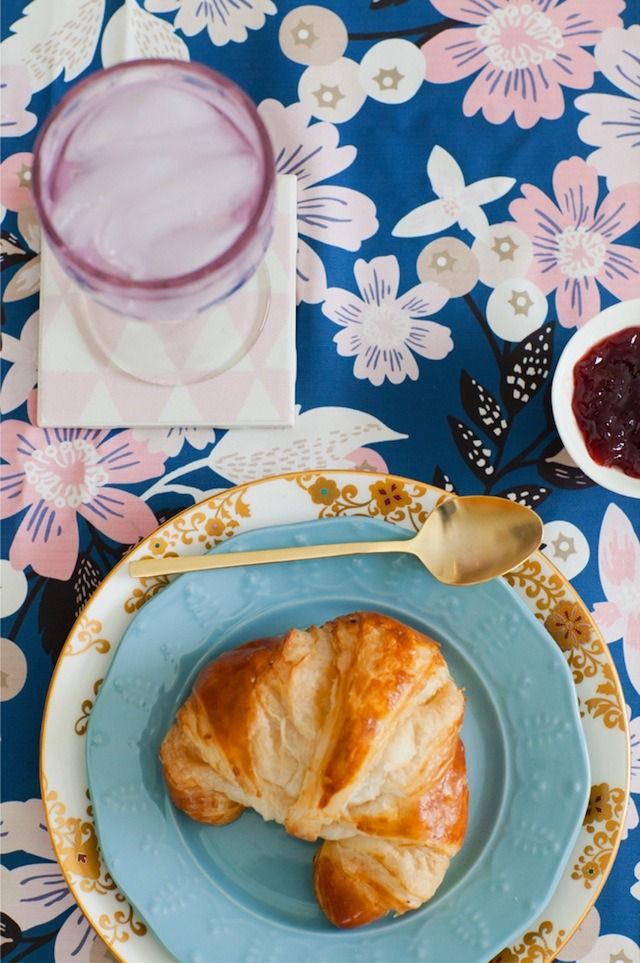
6. Fabric Tile Coasters: Add to your outdoor dining with creative coasters in prints of your choice.

Via Style Me Pretty
Via Style Me Pretty

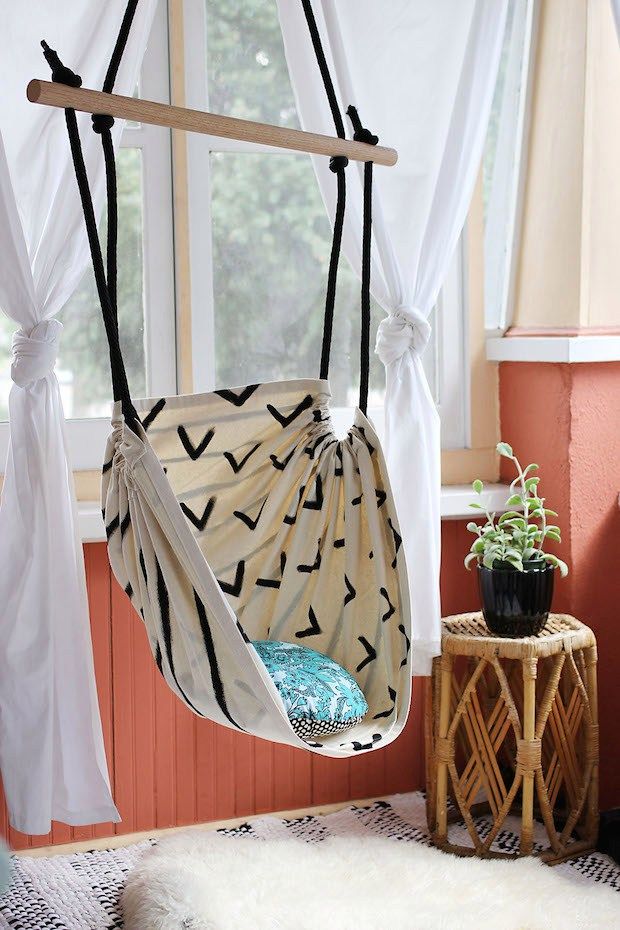
7. Fabric Hammock: DIY your own personal hammock that you never have to share with anyone!  Works equally well outside as well as in.

Via Make
Via Make

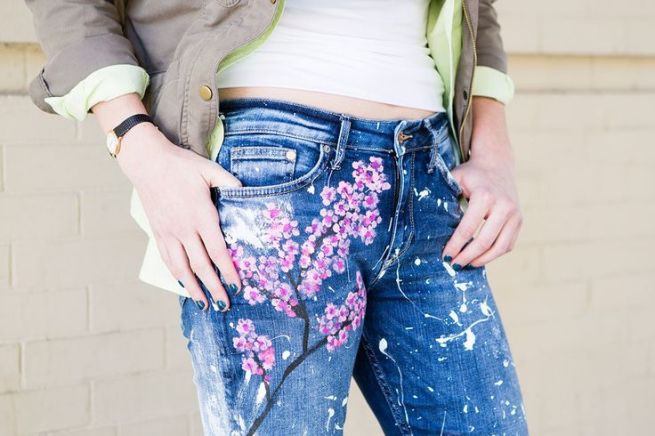
8. Cherry Blossom Jeans: Bring out your inner Blake Lively with this tutorial.

Via Brit + Co
Via Brit + Co

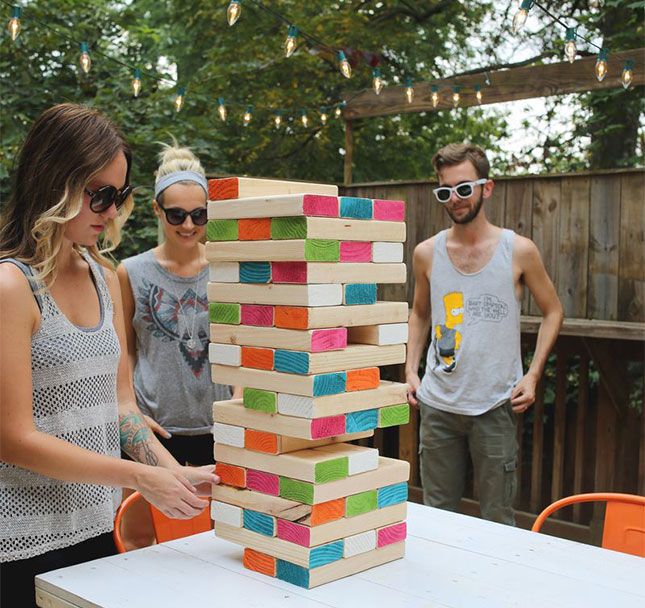
9. Giant Jenga: I cannot wait to make this for my outdoor wedding reception!  Fun is sure to be had by all.

Via A Beautiful Mess

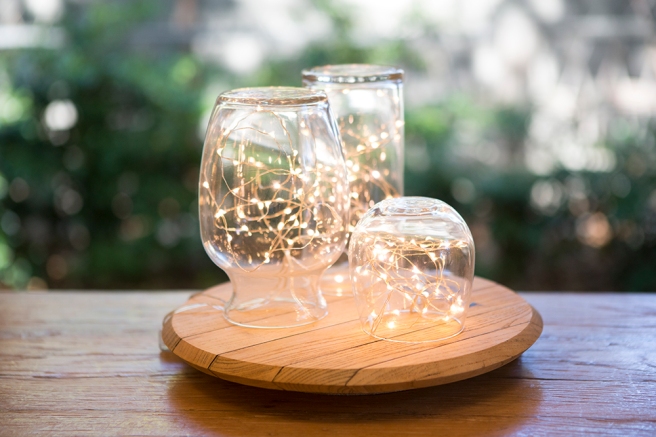
10. Hurricane Lights: Jenga still to fun to stop after sunset?  Add a few of these around to help light your space.

Via nousDECOR
Via nousDECOR

Happy Making!

Stay in for V-Day Dessert with these DIY Ideas + Recipes: Virgin Sangria

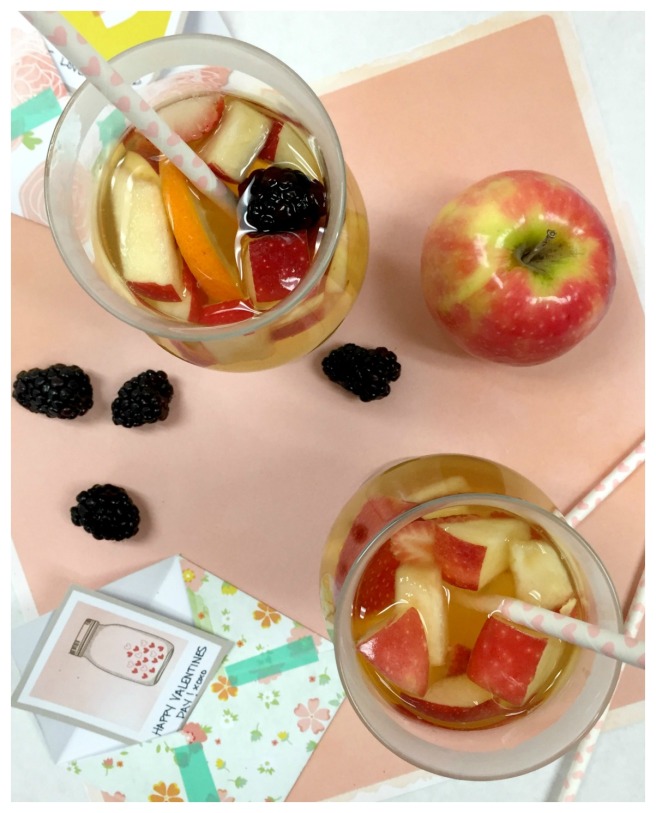
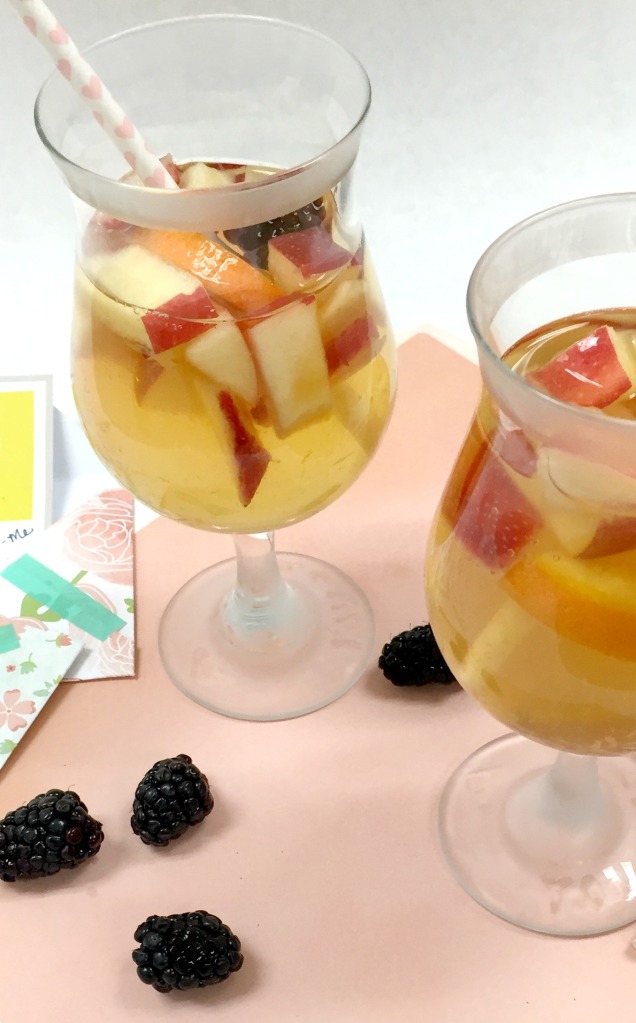
As promised, here is my recipe for virgin sangria.  I love fruit infused drinks, so I think this recipe is best when you let it sit for a few hours before serving to really let all the flavors sink in.  What is great about this recipe is how adaptable it is to what you have and what you like.  Whatever fruit you have on hand, throw it in!  This is a white sangria recipe, but if you prefer red, change out the white grape juice for red.  This recipe is so easy and perfect for your V-Day Night In.

SangriaFrameWhat You’ll Need:

  • 1 bottle sparkling cider or ginger ale
  • White grape juice
  • Fruits of your choice
    • Citrus: orange, lemon, lime
    • Apple, grapes
    • Berries: strawberries, blackberries, blueberries, raspberries
  • Gallon sized pitcher

What To Do:

  1. Slice fruit.  Leave the peels on for more flavor.
  2. Pour the bottle of sparkling cider into a pitcher and add the sliced fruit.
  3. Fill the rest of the pitcher with white grape juice.  Cover and chill for at least 4 hours before serving.

Sangria2

Stay in for V-Day Dessert with These DIY Ideas + Recipes: DIY Valentine’s Day Glassware

Glassware1I will begin this post by first stating that I love the Dollar Tree.  Everything in the store is actually one dollar.  It really bothers me when dollar stores charge more than that.  Its false advertising and must be stopped!

Anyway, I was looking around in the Dollar Tree and found a great set of sangria glasses.  Originally, I had a different idea for these glasses, but this DIY project came to me in a dream… No really… Well sort of.  It was one of those nights where I would wake up every so often because I couldn’t turn my brain off, and that night this idea came to me.

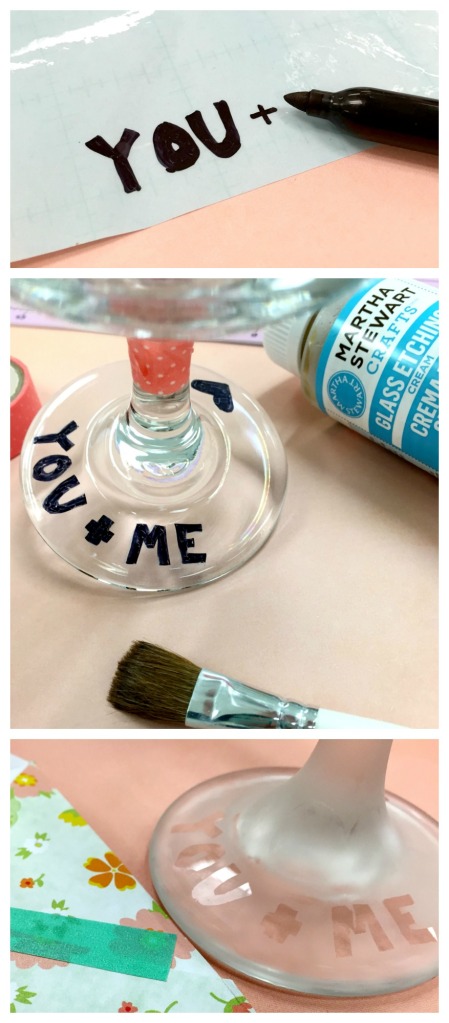
Here is how I created “You + Me” etched Valentine’s sangria glasses:

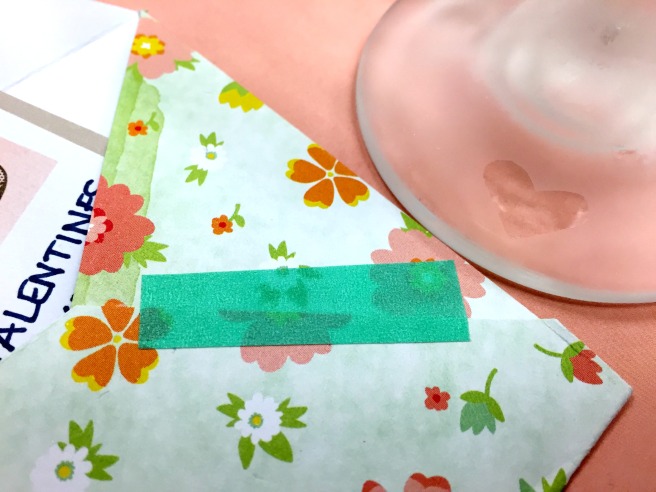
1.  I made my own stencils using Martha Stewart’s stencil making paper.  I used the flexible roll because it shapes around curved surfaces better.  Measuring the distance of the base of the glassware, I decided that my letters could only be 1/2″ tall at the most.  I like writing out my own letters, but this step could easily be accomplished with pre-made stencils.  I wrote and cut out the letters for “You + Me,” and stuck the letters to the base of the glass.  I added a little heart stencil to the other side because…well why not?

2.  I taped off the area of the glass that I did not want to etch and followed the instructions on my etching cream.  I used Martha’s etching cream, too.  Its a little pricey but the product turns out well.

3.  After washing off the etching cream, I peeled the stencils away and voila!  Etched glass.  It is super simple.  You can really be creative with your designs with that stuff.

4.  Lastly, I filled the glasses with my virgin sangria recipe, which I will share with you later!

Glassware Collage1

Honey-Lime Sriracha Salmon

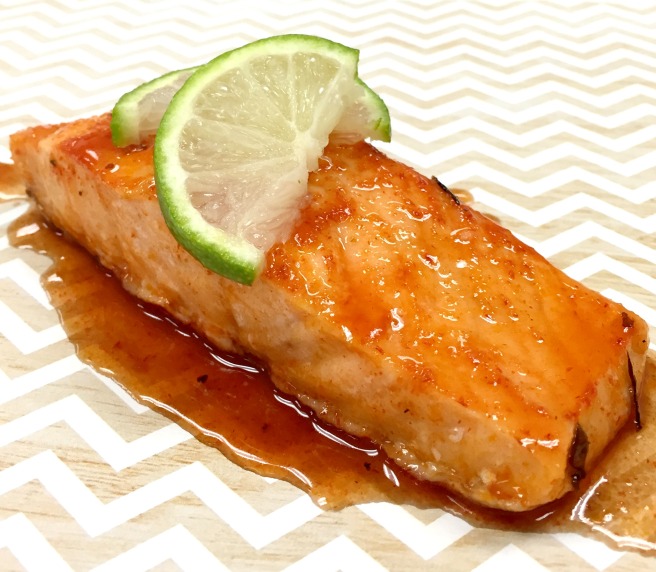
Yesterday after work I completed a doozy of a workout.  When I finished, I sort of laid out very unattractively (don’t judge…) on my living room floor trying to convince myself to get up, cook myself dinner, and clean up so I could make it to Wednesday night church services.  I needed something quick, so I threw together this sweet and spicy salmon recipe.

Full of high-quality protein, vitamins and minerals, and omega-3 fatty acids, salmon is a wonderfully healthy choice and oh so tasty!  Omega-3 fatty acids contribute to brain, heart, and joint health.  Our body does not create this fatty acid, so it must be obtained from our diet.  This super simple and delicious recipe will be ready to eat in 20 minutes!

Salmon2

Honey-Lime Sriracha Salmon

Ingredients

  • 2 salmon fillets
  • Salt + pepper to taste
  • 1 Tbsp Sriracha chili sauce (Add more if you like things a little spicier)
  • 3 Tbsp honey
  • Juice from 1/2 a lime

Directions

  1. Preheat oven to 425 degrees F.
  2. In a small bowl, mix together the Sriracha, honey, and lime juice.
  3. Line a baking dish with parchment paper.
  4. Salt and pepper salmon to taste and place in lined baking dish.
  5. Brush half of the prepared sauce over the fish.  Bake the salmon for 16 minutes, pouring the last half of the sauce over the fish halfway through baking time.

Stay In for V-Day Dessert with These DIY Ideas + Recipes: Creamy Cheesecake with Strawberry Sauce

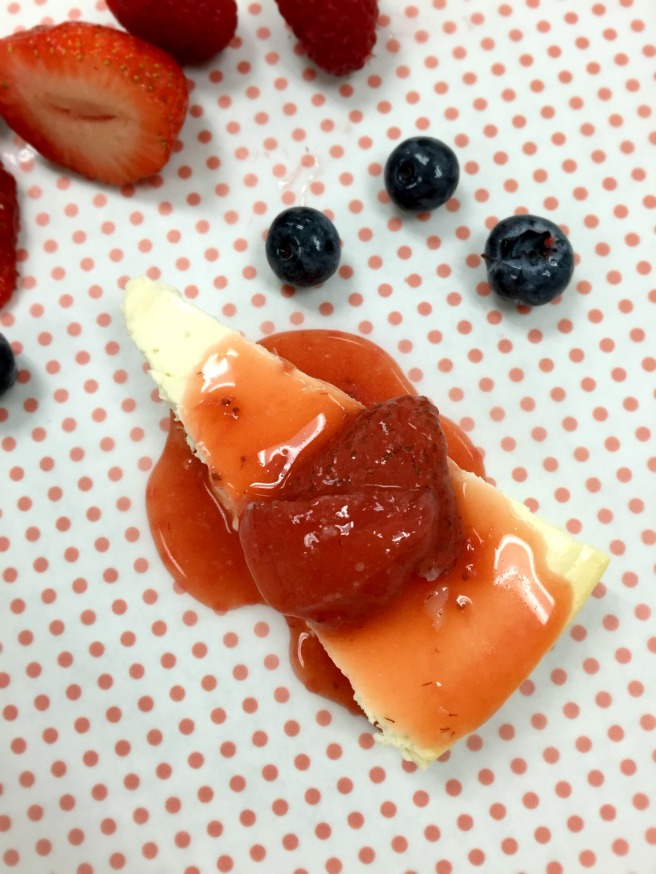
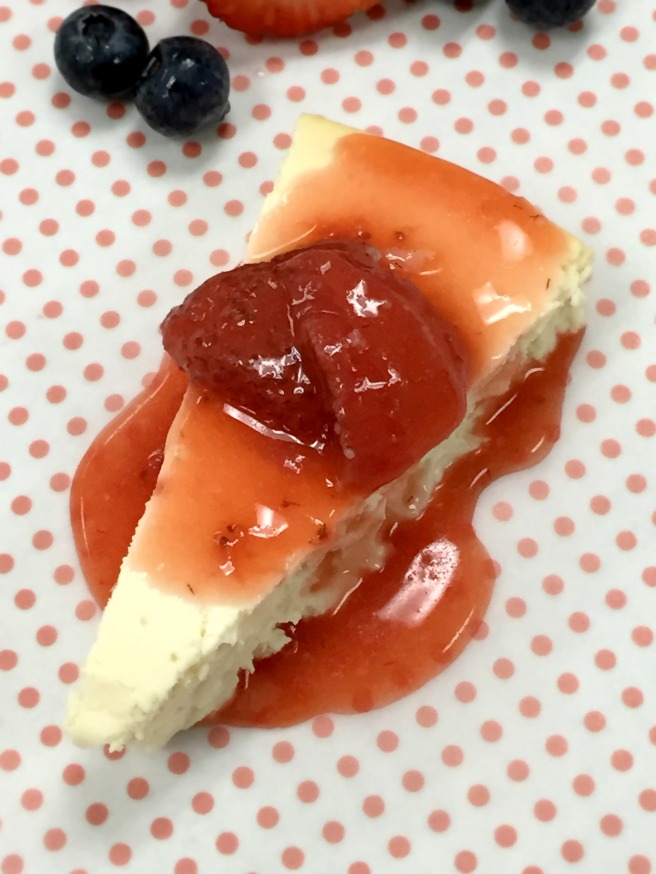
Valentine’s day date night can put a wrinkle in those healthy eating resolutions you made for yourself.  And that’s ok.  I believe that a little indulgence every once in a while is just fine.  However, here is a healthier dessert that still is indulgent-worthy.  This creamy cheesecake is completely refined-sugar-free, and I promise it is wonderful!  You won’t miss the sugar.

Cheesecake2

Creamy Cheesecake with Strawberry Sauce

Ingredients for Cheesecake

  • 3 – 8 oz. pkg. reduced-fat cream cheese (Neufchâtel), softened
  • 1/2 cup light agave nectar
  • 2 Tbsp almond milk
  • 2 tsp vanilla
  • 2 eggs
  • Strawberry Sauce

Directions

  1. Preheat oven to 325 degrees F.  Grease a 9-in springform pan.  Using a double layer heavy-duty foil, create a watertight seal by bringing the edges of the foil up around the edges, molding it to the sides of the pan.
  2. In a stand mixer, beat the softened cream cheese on medium speed until smooth.  *Use the whisk attachment.  Beat in agave nectar, almond milk, and vanilla until well combined.  Scrape the sides and ensure that there are no clumps.  Add eggs and beat on low speed until eggs are combined.
  3. Pour filling into the prepared springform pan.  Place springform pan into a roasting pan.  Create a water bath by adding enough boiling water to the roasting pan to reach about halfway up the springform pan.
  4. Bake for 40 minutes until the center of the cheesecake is nearly set when shaken slightly.  Turn oven off and allow cheesecake to sit in oven for 30 minutes longer, letting it set even more.
  5. Remove from oven.  Remove from water bath.  Remove foil from pan.
  6. Cool on a wire rack for about 15 minutes.  Run a knife along the edges of the pan to loosen the cheesecake.  Let cool even more.  Remove the sides of the springform pan and let cheesecake cool completely.
  7. Cover and chill overnight.
  8. When ready to serve, spoon warm Strawberry Sauce over cheesecake.  Makes 16 slices.

Cheesecake3

Strawberry Sauce

Ingredients for Sauce

  • 2 Tbsp butter
  • 2 cups halved strawberries, fresh (quarter strawberries if they are very large)
  • 1/4 cup white wine
  • 1/2 cup light agave nectar
  • 1/2 cup water + 1/2 tsp cornstarch

Directions

  1. Melt butter in a large skillet over medium heat.  Add strawberries and cook for 5 minutes stirring occasionally until softened.  Remove strawberries from skillet and transfer to a plate.
  2. Add white wine to skillet cooking until most of the liquid is evaporated stirring occasionally, about 3 minutes.
  3. Add agave nectar.  In a separate bowl, mix together the 1/2 cup water and the 1/2 tsp cornstarch until smooth.  Add to skillet and cook until mixture is bubbling and slightly thickened, stirring occasionally.
  4. Add strawberries back to skillet and cook for 2-3 minutes more until sauce is thickened and bubbly, stirring gently.

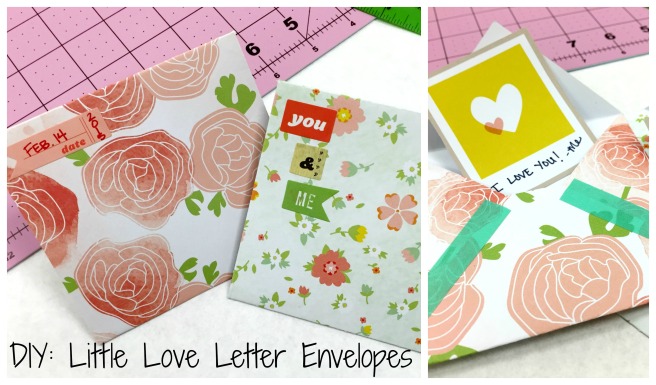
Stay In for V-Day Dessert with These DIY Ideas + Recipes: DIY Little Love Letter Envelopes

Envelope Collage1

You will need:

  • Scrapbook paper
  • Scissors
  • Ruler
  • Washi tape
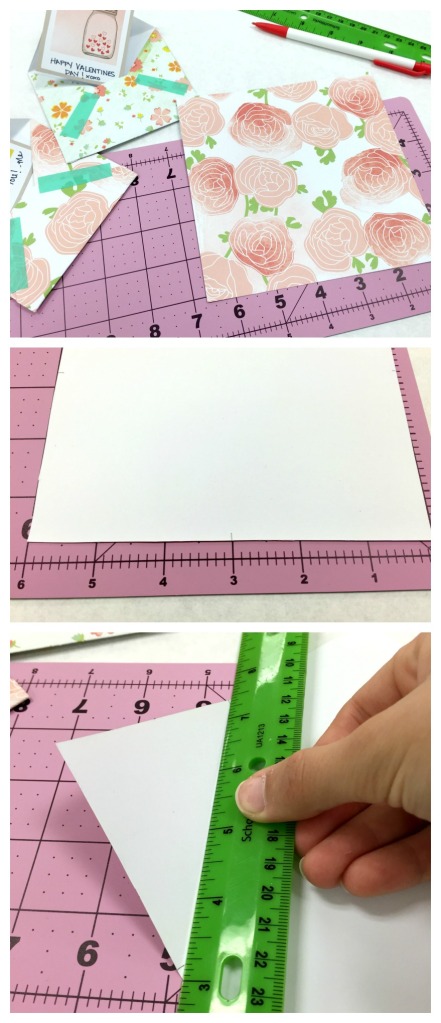
  1. Cut 6″x6″ squares of scrapbook paper.
  2. On the wrong side measure and mark the middle of each edge (3″ mark)
  3. Turn your paper around to make a diamond shape.  Using a ruler to create straight edges, match two of the 3″ marks and create a fold.  Repeat on the opposite side.
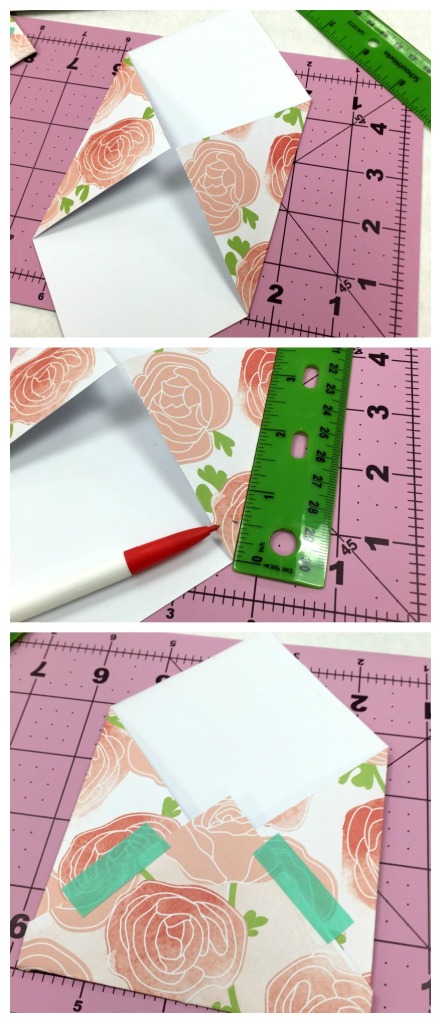
  4. Decide which open edge will be the bottom of your envelope and mark 1/2″ in from the folded edge and repeat of opposite side.  Using your ruler again, match the two marks and create a fold.
  5. Fold down the point of the third side even with the first two edges and cut off the small triangle, creating a straight edge.
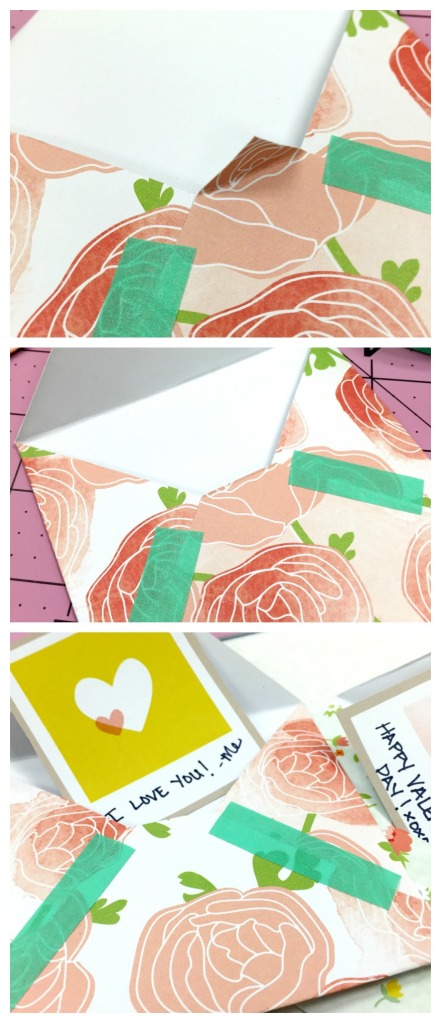
  6. Secure the folds using washi tape.
  7. Insert your little love note.  For a little something extra to create your perfect little love note with, check out this Brit + Co. Calligraphy 101 class!
  8. Fold down the top edge and secure with your own signature seal or just tuck it in.

Envelopes Collage2Envelopes Collage3Envelopes Collage4

Simple White Chicken Pizza

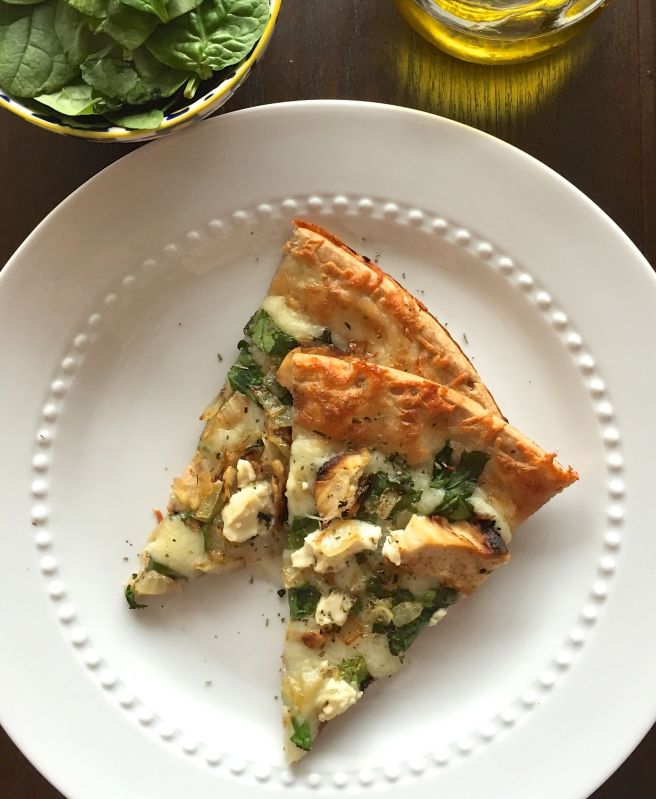
Easy White Chicken Pizza

Cooking for one can be tough.  You go into the grocery store with good intentions, buy a ton of fruits and vegetables, and end up throwing half of them out after they have started rotting in your crisper drawer.  My problem is that I enjoy eating out too much.  I love cooking, but eating out just seemed to be so much easier to do.  No waste.  Unfortunately, eating out has some major downsides like WAY too much fat and salt.  So, in my decision to live healthier, I decided to go back to cooking the majority of my own food.

I love pizza.  It is one of those foods that I just can’t go without.  Earlier in the week, I had made myself grilled chicken gyros.  Super simple, by the way!  I had quite a bit of chicken left over, so I decided to use that on my pizza. So in my need to use up some of the food I purchased from the grocery store, my Easy White Chicken Pizza was born.

NOTE: This pizza is obviously not calorie free.  There is a lot of cheese…  What I can say for it is all the ingredients are whole, natural products that work for your body rather than against it.  Part of healthy living is being able to stick with your goals.  Constant deprivation tends to send people to the dark side.  So enjoy this healthier version of pizza and stick to your healthy living path.

Simple White Chicken Pizza

Ingredients:

  • 1 – 12″ whole wheat pizza crust (Make it yourself or use a pre-made version, just make sure it is actually WHOLE WHEAT)
  • Olive oil
  • 1 pkg. natural shredded italian cheese blend (mozzarella, provolone, parmesan, asiago, fontina, and romano)
  • Baby spinach, fresh
  • 1/4 sweet onion, caramelized (Add more if you really like onions)
  • 1 grilled chicken breast (Simple steps to grilling chicken at the end of this post)
  • Goat cheese, optional
  • Italian seasoning

Directions:

  1. Preheat oven to 400 degrees F.
  2. Dice the sweet onion.  Heat about 1 tablespoon of olive oil in a small skillet over medium heat.  Sauté the onions until they begin to turn a light brown.  Remove from heat.
  3. Brush prepared crust with olive oil and italian seasoning.  Top with Italian cheese blend.
  4. Cut baby spinach into strips, using as much as you prefer.  I used a large handful.  Sprinkle cut spinach on top of cheese.
  5. Add onions to the pizza.
  6. Cut grilled chicken into thin strips, and add to pizza.
  7. I like to sprinkle my pizza with a little goat cheese and italian seasoning to top it off.
  8. Pop your fancy looking pizza into the oven and bake for 10-12 minutes, until cheese is bubbling and just staring to brown.
  9. Serve and enjoy!

Simple Steps to Grilling Chicken

I don’t have a grill living in an apartment, but I do have a nifty grill pan which I love.  Dearly.  Get one.  It is worth the investment.

  1. Season raw chicken breast with your choice of seasoning.  For this pizza I used italian seasoning.
  2. Spray grill pan with a light coating of olive oil.  Heat pan over medium heat.
  3. Add chicken breast to pan, cooking chicken on both sides until cooked through.  Approximately 5-8 minutes per side.